正点原子F429开发板移植LittleVGL 6.0.2(4.3寸 RGB LCD,无触摸)

正点原子F429开发板移植LittleVGL 6.0.2(4.3寸 RGB LCD,无触摸)

发现最近随便转载的很多啊,未经授权禁止转载!抄袭!!否则转载者死全家!!另外这是我的笔记,不是教程,难免会有错误,不具有很高的参考性,望周知。

编写画点函数

LittleVGL的移植需要自己实现在屏幕任一点画颜色点的函数。

这里使用4.3寸RGB接口的屏幕,分辨率为800*480,并使用了外部SDRAM的部分空间作为显存使用。

F429板载的SDRAM读写地址从0xC0000000开始,这里就将这个地址作为显存的起始地址。

颜色格式使用RGB565,即一个像素点占用两个字节,可以计算得出800480分辨率屏幕占用的显存大小为
$$
800
480*2=768000(byte)
$$
在ltdc.c中添加以下代码:

1
2
3
4
5
6
7
8
9
10
11
12
13
14
15
16
17
18
19
20
21
22
23
24
25
26
27
28
29
30
31
32
33
34
35
36
37
38
39
40
41
42
43
44
45
46
47
48
49
50
51
52
53
54
55
56
57
58
59
60
61
/* USER CODE BEGIN 0 */

#define GSDRAM_ADDR (__IO uint16_t*)(0XC0000000) //显存起始地址,这里根据颜色格式使用16bit指针
#define GSDRAM_SIZE (768000) //显存大小(字节)
#define LCD_MAX_X (800) //屏幕最大X坐标
#define LCD_MAX_Y (480) //屏幕最大Y坐标

/*****************************************************
LTDC_Disp_Point
功能:在屏幕上的任意位置显示任意颜色的点
参数:x_point:X坐标
y_point:Y坐标
RGB565_color:RG565颜色
返回值:无
*****************************************************/
void LTDC_Disp_Point(uint16_t x_point, uint16_t y_point, uint16_t RGB565_color)
{
*(GSDRAM_ADDR + x_point + (LCD_MAX_X * y_point)) = RGB565_color; //计算点位置
}

/*****************************************************
LTDC_Fill_Point_Color
功能:以画点的形式填充区域内颜色(矩形)
参数:start_x_point: 起始X坐标
stop_x_point: 结束X坐标
start_y_point: 起始Y坐标
stop_y_point: 结束Y坐标
RGB565_color:RG565颜色
返回值:无
*****************************************************/
void LTDC_Fill_Point_Color(uint16_t start_x_point, uint16_t stop_x_point, uint16_t start_y_point, uint16_t stop_y_point, uint16_t RGB565_color)
{
uint16_t x, y;
for(y = start_y_point; y < stop_y_point; y++) //Y坐标为外循环
{
for(x = start_x_point; x < stop_x_point; x++) //X坐标为内循环
{
LTDC_Disp_Point(x, y, RGB565_color); //以画点形式填充
}
}
}

/*****************************************************
LTDC_Fill_Full_Color
功能:全屏填充颜色
参数:RGB565_color:RG565颜色
返回值:无
*****************************************************/
void LTDC_Fill_Full_Color(uint16_t RGB565_color)
{
uint16_t x, y;
for(y = 0; y < LCD_MAX_Y; y++)
{
for(x = 0; x < LCD_MAX_X; x++)
{
LTDC_Disp_Point(x, y, RGB565_color);
}
}
}

/* USER CODE END 0 */

在ltdc.h文件中添加函数声明:

1
2
3
4
5
/* USER CODE BEGIN Prototypes */
void LTDC_Disp_Point(uint16_t x_point, uint16_t y_point, uint16_t RGB565_color);
void LTDC_Fill_Point_Color(uint16_t start_x_point, uint16_t stop_x_point, uint16_t start_y_point, uint16_t stop_y_point, uint16_t RGB565_color);
void LTDC_Fill_Full_Color(uint16_t RGB565_color);
/* USER CODE END Prototypes */

在main.c文件中,添加测试代码,测试画点函数是否正常。

1

OK,显示没有问题,下面开始移植LittleVGL。

移植LittleVGL

解压和复制文件

首先在工程中创建GUI文件夹。

Snipaste_2022-03-21_21-57-48

然后解压lvgl.zip文件,路径如图。

然后将porting文件夹中的文件进行重命名,重命名后的文件名如图。

将lvgl目录下的lv_conf_template.h和lvgl.h移动到GUI目录中,如图。

将lv_conf_template.h文件重命名为lv_conf.h

解压lv_examples.zip文件,目录结构如图。

更改lv_ex_conf_templ.h文件名为lv_ex_conf.h

添加到Keil工程

打开Keil工程,建立工程分组,如图。

将GUI/lvgl/src目录下的所有.c文件都添加到GUI分组中。此目录为lvgl的主要源代码,这里子目录比较多,需要手动打开目录添加。

添加GUI/lvgl/porting/lv_port_disp.c文件到GUI分组中。此文件总包含lvgl的显示接口。

添加GUI/lvgl_conf.h文件和GUI/lvgl/porting/lv_port_disp.h文件到GUI分组中,方便在编辑器中找到。

将GUI/lv_examples/lv_apps/benchmark目录下的两个.c文件添加到GUI_demos分组中。

添加编译器头文件查找目录。

设置C语言模式为c99

打开lv_conf.h lv_port_disp.c lv_port_disp.c三个文件的宏,否则会报大量错误。

更改lv_port_disp.c文件中的头文件名称(因为之前修改了文件名,否则会报找不到头文件的错误)

编译工程。期间会报几个关于头文件路径的错误,自己修改即可。

遇到报GPU错误,如下。

1
2
3
4
../GUI/lvgl/porting/lv_port_disp.c(115): error: no member named 'gpu_blend' in 'struct _disp_drv_t'; did you mean 'gpu_blend_cb'?
disp_drv.gpu_blend = gpu_blend;
^~~~~~~~~
gpu_blend_cb

打开lv_conf.h文件,关闭LV_USE_GPU宏并重新编译即可解决。

继续编译,又遇到如下错误。

1
2
3
../GUI/lvgl/porting/lv_port_disp.c(154): error: use of undeclared identifier 'disp'
lv_disp_flush_ready(disp);
^

打开lv_port_disp.c文件,找到报错位置,进行如下修改:

1
2
//lv_disp_flush_ready(disp);        //修改前
lv_disp_flush_ready(disp_drv); //修改后

继续编译,已无错误。

继续进行适配,打开lv_conf.h文件,进行修改:

1
2
#define LV_HOR_RES_MAX          (800)        //实际屏幕宽度
#define LV_VER_RES_MAX (480) //实际屏幕高度

打开lv_port_disp.c文件,修改lv_port_disp_init函数:

1
2
3
4
5
6
7
8
9
10
11
12
13
14
15
16
17
18
19
20
21
22
23
24
25
26
27
28
29
30
31
32
33
34
35
36
37
38
39
40
41
42
43
44
45
46
47
48
49
50
51
52
53
54
55
56
57
58
59
60
61
62
63
64
65
66
67
68
69
70
71
72
73
74
75
76
77
78
79
80
void lv_port_disp_init(void)
{
/*-------------------------
* Initialize your display
* -----------------------*/
disp_init();

/*-----------------------------
* Create a buffer for drawing
*----------------------------*/

/* LittlevGL requires a buffer where it draws the objects. The buffer's has to be greater than 1 display row
*
* There are three buffering configurations:
* 1. Create ONE buffer with some rows:
* LittlevGL will draw the display's content here and writes it to your display
*
* 2. Create TWO buffer with some rows:
* LittlevGL will draw the display's content to a buffer and writes it your display.
* You should use DMA to write the buffer's content to the display.
* It will enable LittlevGL to draw the next part of the screen to the other buffer while
* the data is being sent form the first buffer. It makes rendering and flushing parallel.
*
* 3. Create TWO screen-sized buffer:
* Similar to 2) but the buffer have to be screen sized. When LittlevGL is ready it will give the
* whole frame to display. This way you only need to change the frame buffer's address instead of
* copying the pixels.
* */

// /* Example for 1) */ //屏蔽
// static lv_disp_buf_t disp_buf_1;
// static lv_color_t buf1_1[LV_HOR_RES_MAX * 10]; /*A buffer for 10 rows*/
// lv_disp_buf_init(&disp_buf_1, buf1_1, NULL, LV_HOR_RES_MAX * 10); /*Initialize the display buffer*/

/* Example for 2) */
static lv_disp_buf_t disp_buf_2;
static lv_color_t buf2_1[LV_HOR_RES_MAX * 10]; /*A buffer for 10 rows*/
static lv_color_t buf2_2[LV_HOR_RES_MAX * 10]; /*An other buffer for 10 rows*/
lv_disp_buf_init(&disp_buf_2, buf2_1, buf2_2, LV_HOR_RES_MAX * 10); /*Initialize the display buffer*/

/* Example for 3) */ //屏蔽
// static lv_disp_buf_t disp_buf_3;
// static lv_color_t buf3_1[LV_HOR_RES_MAX * LV_VER_RES_MAX]; /*A screen sized buffer*/
// static lv_color_t buf3_2[LV_HOR_RES_MAX * LV_VER_RES_MAX]; /*An other screen sized buffer*/
// lv_disp_buf_init(&disp_buf_3, buf3_1, buf3_2, LV_HOR_RES_MAX * LV_VER_RES_MAX); /*Initialize the display buffer*/


/*-----------------------------------
* Register the display in LittlevGL
*----------------------------------*/

lv_disp_drv_t disp_drv; /*Descriptor of a display driver*/
lv_disp_drv_init(&disp_drv); /*Basic initialization*/

/*Set up the functions to access to your display*/

/*Set the resolution of the display*/
disp_drv.hor_res = 800; //修改为实际屏幕尺寸
disp_drv.ver_res = 480;

/*Used to copy the buffer's content to the display*/
disp_drv.flush_cb = disp_flush;

/*Set a display buffer*/
disp_drv.buffer = &disp_buf_2;

#if LV_USE_GPU
/*Optionally add functions to access the GPU. (Only in buffered mode, LV_VDB_SIZE != 0)*/

/*Blend two color array using opacity*/
disp_drv.gpu_blend = gpu_blend;

/*Fill a memory array with a color*/
disp_drv.gpu_fill = gpu_fill;
#endif

/*Finally register the driver*/
lv_disp_drv_register(&disp_drv);
}

完善disp_flush函数,添加屏幕画点函数接口。

1
2
3
4
5
6
7
8
9
10
11
12
13
14
15
16
17
18
19
static void disp_flush(lv_disp_drv_t * disp_drv, const lv_area_t * area, lv_color_t * color_p)
{
/*The most simple case (but also the slowest) to put all pixels to the screen one-by-one*/

int32_t x;
int32_t y;
for(y = area->y1; y <= area->y2; y++) {
for(x = area->x1; x <= area->x2; x++) {
/* Put a pixel to the display. For example: */
/* put_px(x, y, *color_p)*/
LTDC_Disp_Point(x, y, *(uint16_t*)color_p); //任意位置画点
color_p++;
}
}

/* IMPORTANT!!!
* Inform the graphics library that you are ready with the flushing*/
lv_disp_flush_ready(disp_drv);
}

添加lvgl的心跳函数添加至SysTick_Handler函数中进行调用,心跳节拍由滴答定时器产生。

1
2
3
4
5
6
7
8
9
10
void SysTick_Handler(void)
{
/* USER CODE BEGIN SysTick_IRQn 0 */

/* USER CODE END SysTick_IRQn 0 */
HAL_IncTick();
/* USER CODE BEGIN SysTick_IRQn 1 */
lv_tick_inc(1); //LittleVGL心跳,1ms调用一次
/* USER CODE END SysTick_IRQn 1 */
}

打开lv_ex_conf.h文件,根据需要跑的demo,打开相应的宏。

1
2
3
4
5
6
7
8
9
10
11
12
13
14
15
16
17
18
19
20
21
22
23
24
25
26
27
28
29
30
31
32
33
34
35
36
37
38
39
40
41
42
43
44
45
46
47
48
49
50
51
52
53
54
55
56
57
58
59
60
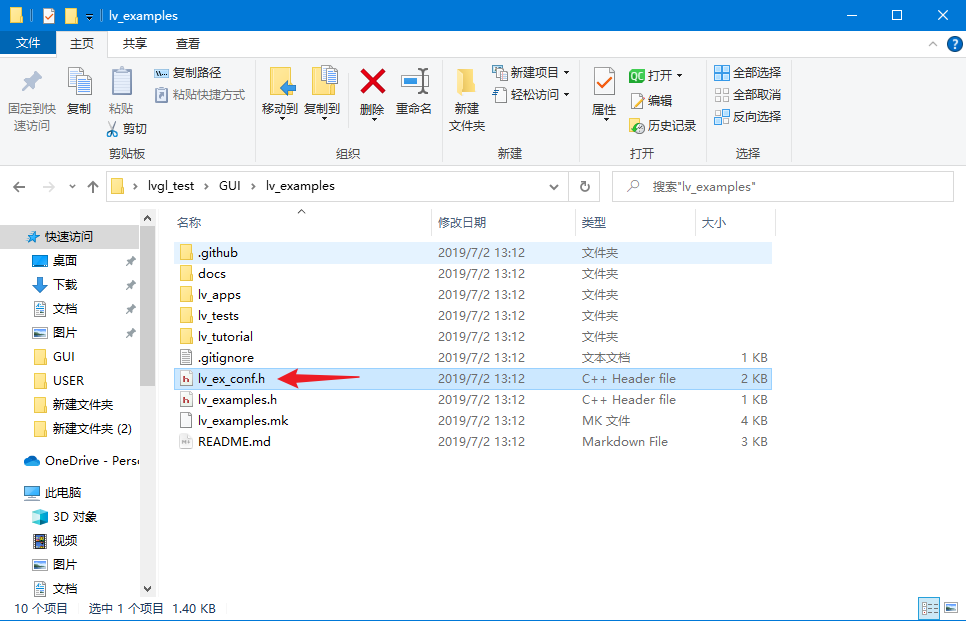
/**
* @file lv_ex_conf.h
*
*/
/*
* COPY THIS FILE AS lv_ex_conf.h
*/

#if 1 /*Set it to "1" to enable the content*/

#ifndef LV_EX_CONF_H
#define LV_EX_CONF_H

/*******************
* GENERAL SETTING
*******************/
#define LV_EX_PRINTF 0 /*Enable printf-ing data*/
#define LV_EX_KEYBOARD 1 /*Add PC keyboard support to some examples (`lv_drivers` repository is required)*/
#define LV_EX_MOUSEWHEEL 0 /*Add 'encoder' (mouse wheel) support to some examples (`lv_drivers` repository is required)*/

/*******************
* TEST USAGE
*******************/
#define LV_USE_TESTS 1

/*******************
* TUTORIAL USAGE
*******************/
#define LV_USE_TUTORIALS 1


/*********************
* APPLICATION USAGE
*********************/

/* Test the graphical performance of your MCU
* with different settings*/
#define LV_USE_BENCHMARK 1

/*A demo application with Keyboard, Text area, List and Chart
* placed on Tab view */
#define LV_USE_DEMO 1
#if LV_USE_DEMO
#define LV_DEMO_WALLPAPER 1 /*Create a wallpaper too*/
#define LV_DEMO_SLIDE_SHOW 1 /*Automatically switch between tabs*/
#endif

/*MCU and memory usage monitoring*/
#define LV_USE_SYSMON 1

/*A terminal to display received characters*/
#define LV_USE_TERMINAL 1

/*Touch pad calibration with 4 points*/
#define LV_USE_TPCAL 1

#endif /*LV_EX_CONF_H*/

#endif /*End of "Content enable"*/

在main.c文件中添加lvgl初始化代码和测试例程。

1
2
3
4
5
6
7
8
9
10
11
12
13
14
15
16
#include "lvgl.h"
#include "lv_port_disp.h"
#include "lv_apps\benchmark\benchmark.h"
····
int main()
{
···
lv_init(); //lvgl系统初始化
lv_port_disp_init(); //lvgl显示接口初始化,放在lv_init()的后面
benchmark_create(); //显示demo
while(1)
{
lv_task_handler();
HAL_Delay(5);
}
}

继续编译就没有错误了。屏幕可以显示了,如下图。因为当前工程并没有包含触摸屏部分,所以无法控制。

坚持原创技术分享,您的支持是我前进的动力!